
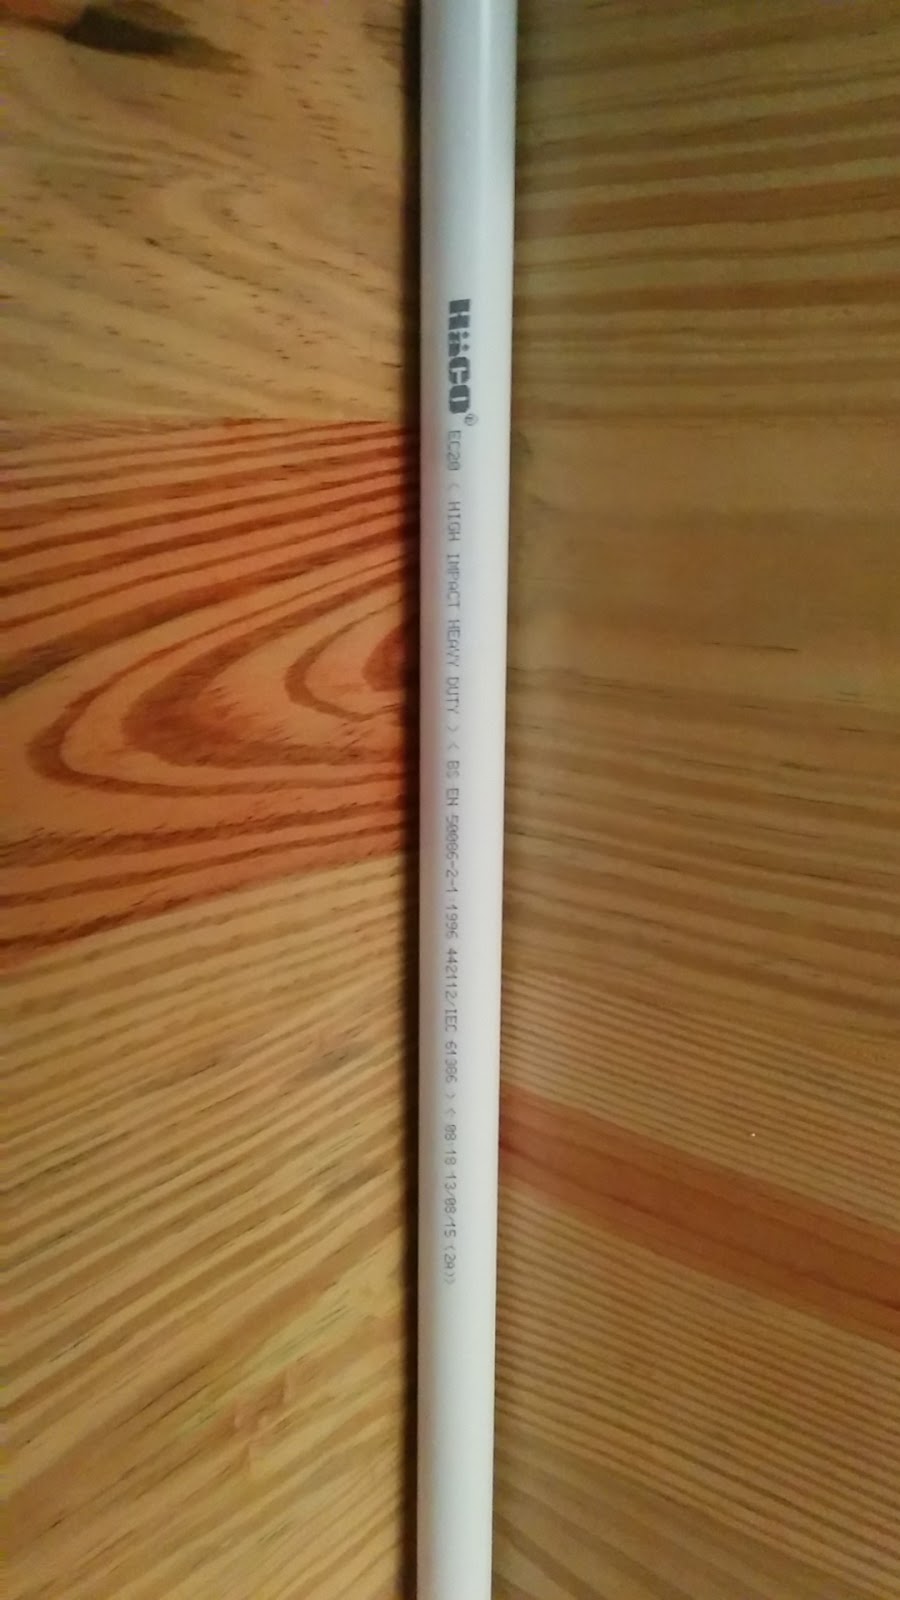
But after going through all that effort to get the rustic light colored wood look of pine wood walls, who wants to have white plasticky looking PVC pipes running down the walls in any room that has electrical outlets? (Which is basically every room.)
But now imagine that a little bit of elbow grease can turn those white PVC pipes into something that looks uncannily like wood:
And I was pretty darn surprised by how much the results look like wood!
The technique I used came from a combination of this very useful page and this instructable. I mostly followed the technique of the instructable, but experimenting with the oil paints like they recommended resulted in a slightly sticky surface that was too orange for my tastes. (There wasn’t that much of a selection of oil paints at B2S Central Rama 2, so I tried “raw sienna” color.)
I also tried wood stain like the first link above suggested (“chestnut” color) but the color came out quite ugly. My theory is that wood stain expects to mix in with the natural wood coloring of the underlying wood. Without the natural wood color underneath, it didn’t look like wood at all.
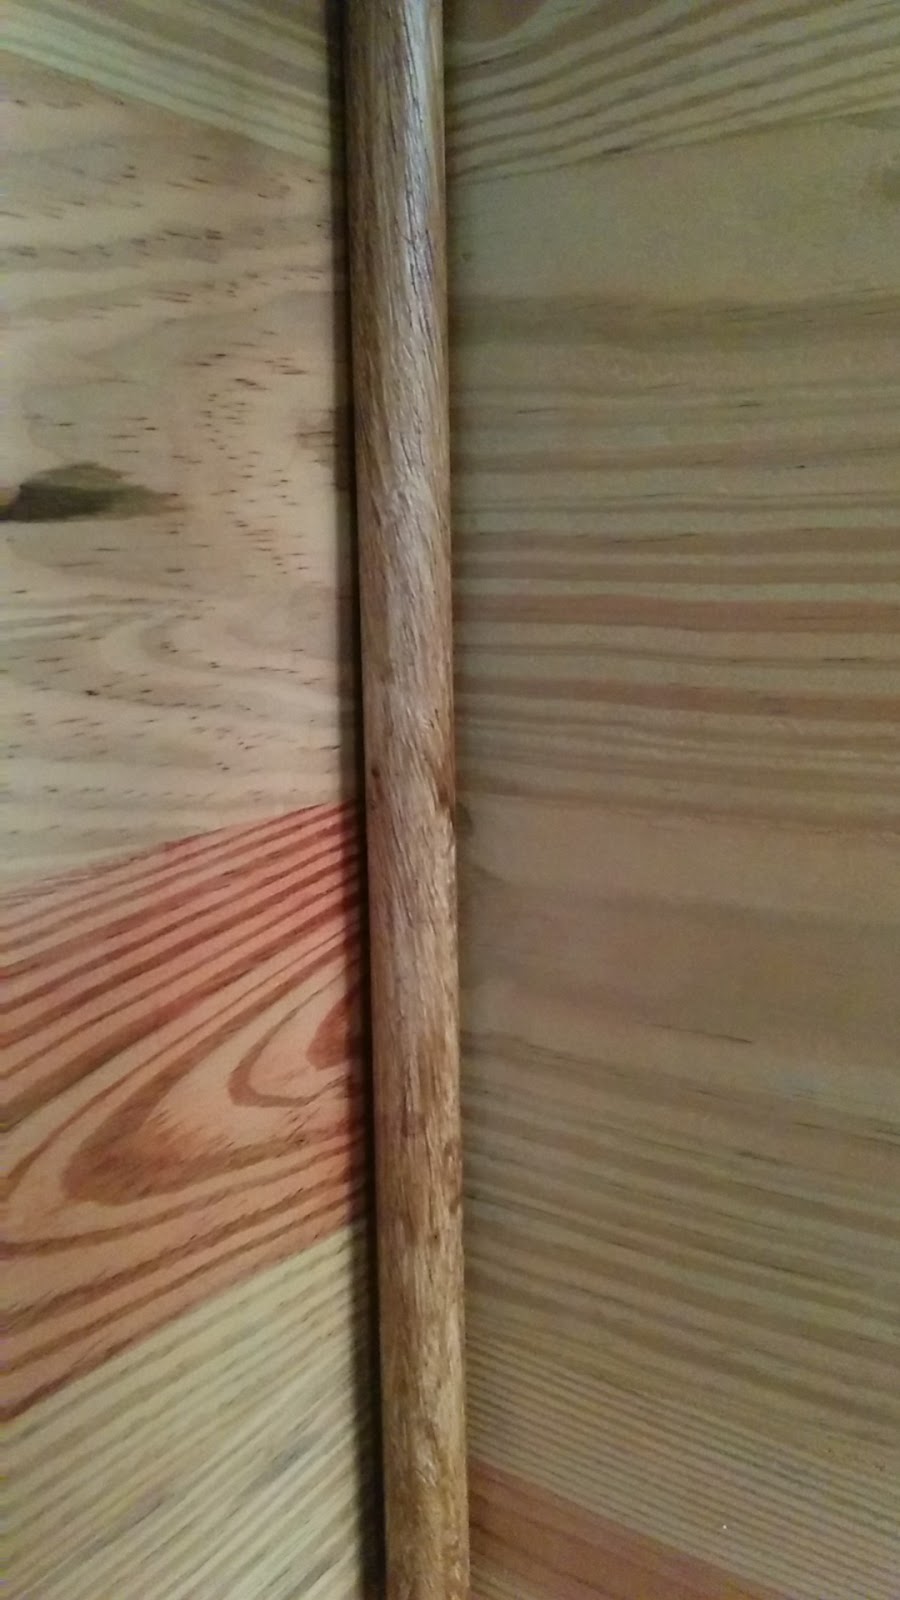
Since we had some leftover cement board stain lying around from our cement board balcony, I decided to give that a try. (We used “teak” color fiber cement deck stain.) This led to the positive results shown above. This makes a kind of sense, since cement board doesn’t have the natural wood coloring of real wood, so the stain must introduce it. The other difference I used was that I rubbed the stain in with a cloth like both links recommend to get the color into the fake “wood grain” grooves, but then I did another pass (without waiting for it to dry) with a soft brush to get a thicker richer color on the PVC surface. (The brush strokes also add another “wood grain” like texture.)
Here is a summary of the steps I took:
- Put on a dust mask. This is very important since PVC dust does really nasty things to your lungs. (Or so I’ve heard. I’m not interested in trying for myself!)
- Using 100 grit sandpaper wrapped around the PVC pipe, sand down the shiny surface of the PVC until the printing on the pipe is gone and the overall surface has a very matte appearance.
- Take a wood rasp and scratch grooves into the PVC. I found that the best results came from holding the PVC pipe on my lap with one hand and slowly rolling it along the top of my legs while firmly running the rasp over it to my side in order to make as deep grooves as a could in a slightly diagonal direction. When it had a good coverage of grooves all over, I flipped over the PVC pipe in order to try to make grooves in the other diagonal direction. This rasp work was the step that took the most effort and time.
- The PVC comes off in the rasp in little hair-like strips, and can clog the rasp teeth. It is worth noting that a metal wire brush quickly clears out the PVC scrapings from the rasp.
- Once the grooves are cut into the PVC, I flipped over the rasp to the “double cut” side and used it fairly quickly to clean off the messy pieces sticking out from the grooves. (I used a standard 4-way wood rasp.)
- After that comes a quick round of sanding with the same 100 grit sandpaper from above. At this point, the surface of the PVC should feel quite a bit like wood when you run your finger over it. Only the color is wrong.
- Then I dipped an old rag into the cement board deck stain and rubbed it into the grooves.
- The previous step results in a good wood-grain appearance, but I found that the color on the surface of the PVC was still too faint. A quick layer of the same stain added with a soft hair brush helped to address this. Experiment with strokes and styles until it looks the way you want.
- Finally, let it dry for a day or so.
That’s it! Other than the rasping step, it went quite quickly. I am sort of the lazy type these days, so I think I will try to show the wood craftsman that did most of the wood work in our house how to do this and hand it off. We have another 50 meters or so of PVC piping to process this way. That’s what you get from someone whose career went from being very “hand’s on” 20 years ago to someone who spends most of every work day in meetings and managing people now. 😉
Anyway, here are two more pictures comparing the look of the PVC tucked into the corner made by an exposed wall stud. The wall studs and posts are a darker color than the pine wood walls (they are made from “mai teng”) and cause the white PVC to really jump out.
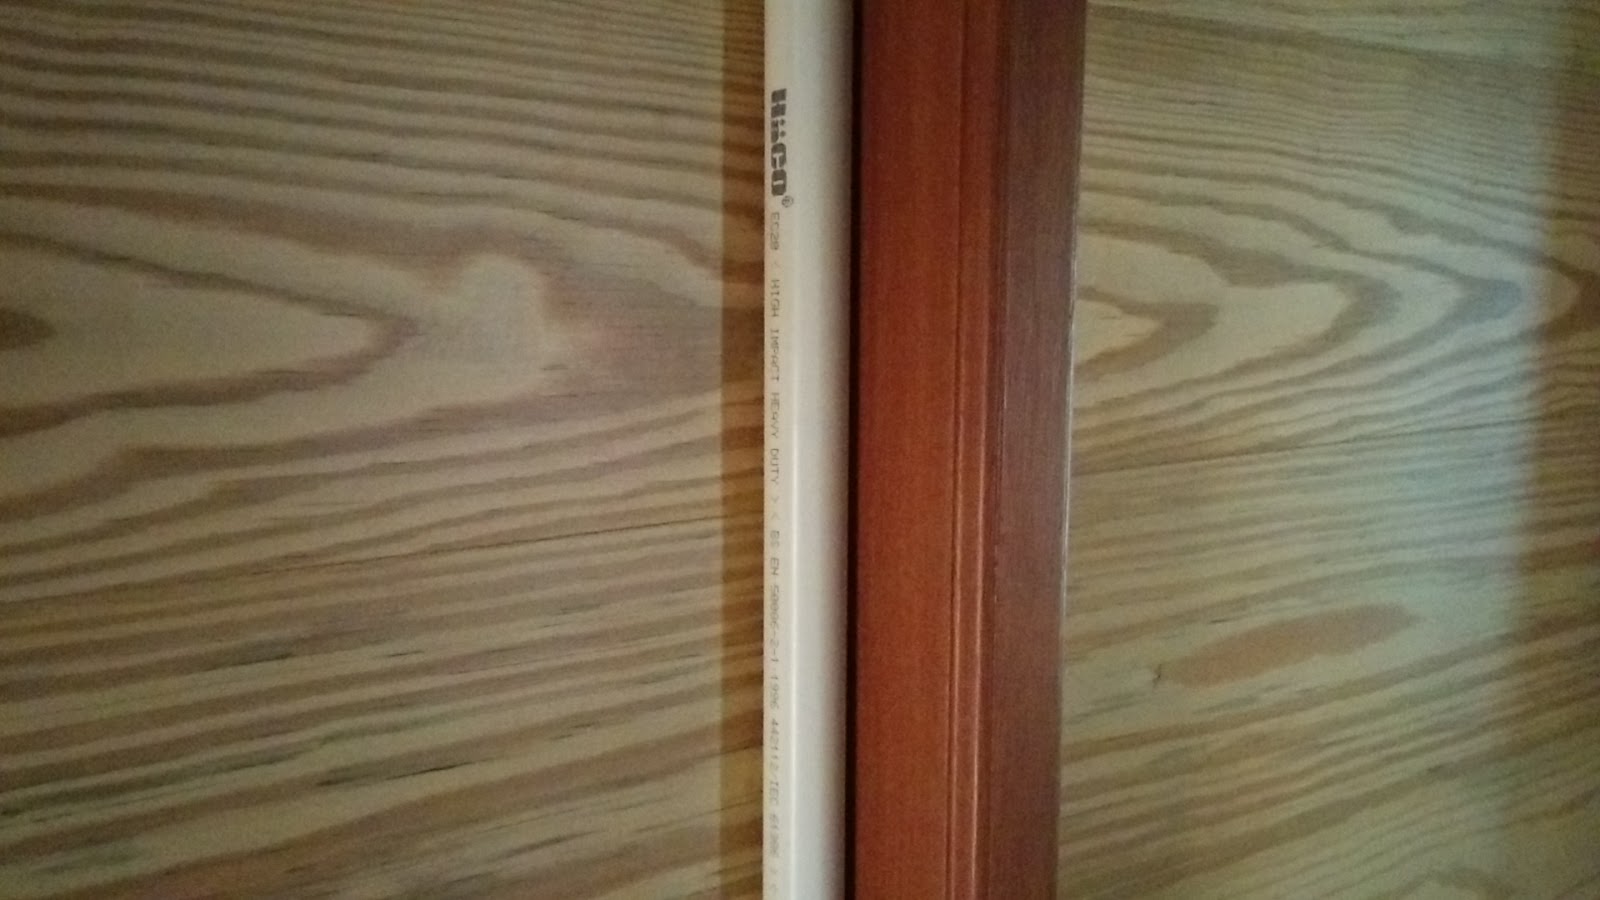

Again, I think this process really works miracles in terms of making the PVC fit in seamlessly when mounted against our walls.