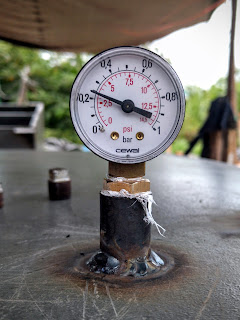
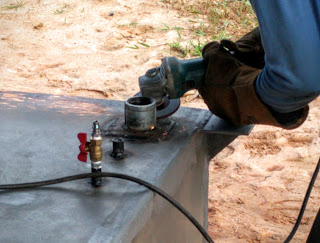
The first pontoon was completely done welding so did our first test to see if there are any holes that might leak. The basic idea is that we welded on a few extra connectors to the top corner of the pontoon. The first allows us to screw in a pressure gauge. The second allows us to connect to our air pump. The third (unused on this test) is a large diameter opening that allows me to look inside and see if water is filling up inside the pontoon, and possibly pump the water out until the pontoon can be replaced.
So if we pressurize the inside of the pontoon and spray soapy water onto every welded seam, then any holes in the weld that leak air would become visible as the escaping air makes bubbles in the soapy water. Since water is much more viscous than air, if we make the pontoon air tight, it should be water tight too. So I’m hoping to pressurize the pontoon and leave it for around a day. If I come back and there is only trivial pressure loss, then the pontoon should be water tight.
It is worth mentioning that the pressure on the pontoon in the water would be pushing inwards, but this test works with air pressure pushing outwards. So it isn’t really a test of structural integrity under pressure. It is just testing the integrity of the skin.
First the test starts by pumping air into the pontoon. Water pressure increases by 1.4psi per meter of depth. Since the pontoon is only 50cm high, it will be completely submerged when the bottom is only half a meter deep. So I figure that testing it with pressures of more than 2m water depth should be plenty of safety margin. This comes out to 2.8psi. Kong, the engineer that designed the structure promised me that it can handle a lot more pressure than this without problems.
So we ended up pressurizing the pontoon up to about 3.5psi
Here is a wider view
On the left side is the valve and attachment where we connect the air pressure pump. In the middle is the pressure gauge. And on the right is the larger pipe connection which allows me to look inside.
As expected, the pontoon groaned and clanked as it was filled with air and the plate steel surfaces were all pushed outwards. But it held nicely.
After 5 minutes, there was no noticeable change in the air pressure on the gauge. So we walked away for several hours and ate lunch. After coming back, there was a very slight reduction in pressure:
You can see that the gauge has dropped from about 3.5psi down to about 3psi. This was actually much better than I hoped for the very first test. Kudos to the welder!
The first leak was around the seal in the stopper of the large 2.5″ inlet on the right side. But in addition to this, there were two leaks at the weld around the base of the same pipe.
There was only one leak that was on a welded seam on the pontoon. And it was on a top seam, so it wouldn’t be a serious issue under normal usage. Here is a video of the soapy water spray test on this leak:
That leak was pretty small and easily fixed. A bigger problem was the two leaks at the base of the cast iron pipe used for the larger hole. Here are two videos of those:
So the welder took a few tries at grinding it down and re-welding this:
But it didn’t really work out. Probably because it was cast iron vs steel. So I ended up asking him to remove this inlet altogether since it isn’t really needed for the pressure test.
He’ll weld on a small plate to seal this up completely and we’ll try again tomorrow. But honestly, I was worried about ending up with hundreds of little holes that would be difficult to trace them all down. I am very pleased indeed only finding one on the seams of the pontoon. This crazy idea of building our own steel pontoons just might work after all. 🙂


